Automatic Water Dispenser using Arduino
Water covers about 71% of the earth, but sadly there is only drinking water in 2.5% of it. In 2025 we can expect perennial water shortages due to increased population, pollution, and clim…
Know the mission before touching a wire.
Understand what you are making, prepare the right tools, and make the workbench safe.
Project details
Automatic Water Dispenser using Arduino is a arduino project. Water covers about 71% of the earth, but sadly there is only drinking water in 2.5% of it. In 2025 we can expect perennial water shortages due to increased population, pollution, and clim…
- Source pages
- 689-692
- Named parts
- 6
- Build goal
- Working, tested prototype
Tools you need
- Digital multimeter
- Wire stripper and side cutters
- Soldering iron with a fine tip
- Current-limited bench supply
- Computer with a data-capable USB cable
Use eye protection, good lighting, and a clean insulated surface throughout the build.
Safety precautions
- Disconnect every power source before changing a connection.
- Check component polarity, pinout, and supply voltage twice.
- Use a current limit for the first power-up.
- Keep liquids, loose metal, and uninsulated wires away from the bench.
Gather, identify, and understand every part.
Use the standardized inventory, then open What's this? to learn each part's role, advantages, limitations, handling, and specifications.
What's this?Image, role, pros, cons, handling & specifications
Solenoid Valve, Arduino Uno (any version)
A programmable controller that reads inputs, makes decisions, and drives the project's outputs.
What it does hereIt is the control centre and must use the documented board, pin map, supply, and logic level.
Buy / compare this part ↗Advantages
- Reprogrammable and reusable
- Large learning ecosystem
- Complex behaviour remains changeable
Limitations
- GPIO voltage and current are limited
- Some pins affect boot or communication
- Loads normally need a driver
Handling
- Disconnect power before rewiring
- Avoid static discharge
- Never power motors, relays, or pumps directly from GPIO
Specifications to verify
- Use the exact model, value, package, and rating listed for Solenoid Valve, Arduino Uno (any version); similar-looking parts are not always interchangeable.
- Confirm operating voltage, logic level, pinout, memory, USB interface, and maximum GPIO current.
What's this?Image, role, pros, cons, handling & specifications
HCSR04 – Ultrasonic Sensor
A sensor converts a physical condition into an electrical signal the circuit can measure.
What it does hereIt provides project input as an analogue, digital, resistive, frequency, or calibrated signal.
Buy / compare this part ↗Advantages
- Adds real-world awareness
- Can usually be tested independently
- Often supports calibration
Limitations
- Readings can drift
- Placement affects results
- Some sensors need warm-up or calibration
Handling
- Protect the sensing surface
- Observe supply voltage and polarity
- Keep signal leads away from noisy power wiring
Specifications to verify
- Use the exact model, value, package, and rating listed for HCSR04 – Ultrasonic Sensor; similar-looking parts are not always interchangeable.
- Confirm supply range, output type, measurement range, accuracy, response time, and pin order.
What's this?Image, role, pros, cons, handling & specifications
 SEMICONDUCTOR LEARNING VIEW
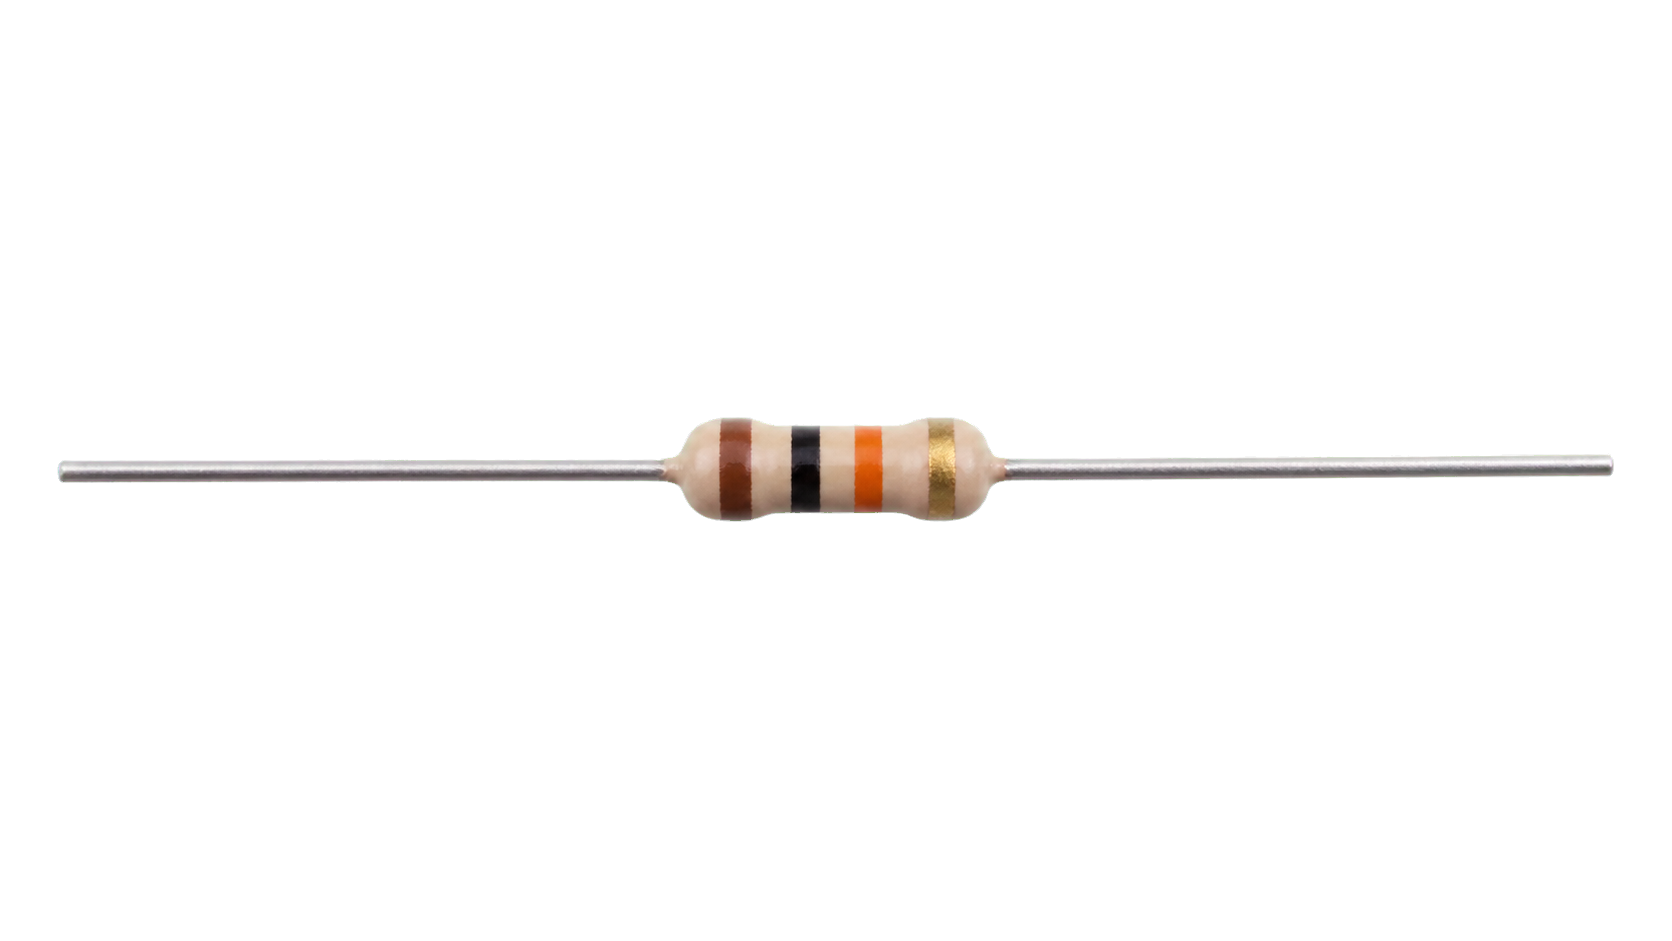
IRF540 MOSFET, 1k and 10k Resistor
A semiconductor stage performs switching, amplification, regulation, rectification, or logic.
What it does hereIt controls current or signal flow at a defined point in the circuit.
Buy / compare this part ↗Advantages
- Fast and efficient
- Compact
- Can control larger loads from smaller signals
Limitations
- Pin order varies
- Sensitive to overvoltage and reverse polarity
- May need cooling or bias components
Handling
- Verify the datasheet pinout
- Avoid static and soldering heat
- Check notch, stripe, or flat-face orientation
Specifications to verify
- Use the exact model, value, package, and rating listed for IRF540 MOSFET, 1k and 10k Resistor; similar-looking parts are not always interchangeable.
- Confirm pinout, maximum voltage/current, dissipation, gain or forward voltage, and package.
What's this?Image, role, pros, cons, handling & specifications
Breadboard, Connecting Wires
A named project component whose exact role is defined by the source circuit and build guide.
What it does hereIt performs a documented electrical, control, interface, or construction function in this project.
Buy / compare this part ↗Advantages
- Selected for this project
- Can be checked independently
- Supports modular troubleshooting
Limitations
- Substitutes may differ
- Generic names can hide variants
- Pinouts and ratings vary
Handling
- Compare the received part with the source
- Keep it labelled
- Do not force connectors or adjusters
Specifications to verify
- Use the exact model, value, package, and rating listed for Breadboard, Connecting Wires; similar-looking parts are not always interchangeable.
- Confirm dimensions, ratings, connection method, polarity, and environmental limits.
What's this?Image, role, pros, cons, handling & specifications
water. Which generates electricity to operate when activated, and de
A named project component whose exact role is defined by the source circuit and build guide.
What it does hereIt performs a documented electrical, control, interface, or construction function in this project.
Buy / compare this part ↗Advantages
- Selected for this project
- Can be checked independently
- Supports modular troubleshooting
Limitations
- Substitutes may differ
- Generic names can hide variants
- Pinouts and ratings vary
Handling
- Compare the received part with the source
- Keep it labelled
- Do not force connectors or adjusters
Specifications to verify
- Use the exact model, value, package, and rating listed for water. Which generates electricity to operate when activated, and de; similar-looking parts are not always interchangeable.
- Confirm dimensions, ratings, connection method, polarity, and environmental limits.
What's this?Image, role, pros, cons, handling & specifications
IRF540N - MOSFET
A semiconductor stage performs switching, amplification, regulation, rectification, or logic.
What it does hereIt controls current or signal flow at a defined point in the circuit.
Buy / compare this part ↗Advantages
- Fast and efficient
- Compact
- Can control larger loads from smaller signals
Limitations
- Pin order varies
- Sensitive to overvoltage and reverse polarity
- May need cooling or bias components
Handling
- Verify the datasheet pinout
- Avoid static and soldering heat
- Check notch, stripe, or flat-face orientation
Specifications to verify
- Use the exact model, value, package, and rating listed for IRF540N - MOSFET; similar-looking parts are not always interchangeable.
- Confirm pinout, maximum voltage/current, dissipation, gain or forward voltage, and package.
Connect one verified path at a time.
Explore the named components and standardized signal flow, then use Source Check to verify exact physical pins, values, and topology before applying power.
Trace this circuit.
Automatic Water Dispenser using Arduino: interactive parts, standardized terminals, responsive anchored wires, student explanations, and the original circuit reference in one shared system.
Trace before wiring
Follow power, ground, inputs, processing, and outputs in that order. Never guess a pin from package shape alone.
Connect with power off
Make short, labelled connections and share a common ground only where the schematic requires it.
Inspect every joint
Check continuity, polarity, adjacent shorts, and loose connections before the first power-up.
Open all source diagrams and build views 1 visuals
Confirm the hardware-only control path.
This project does not include firmware in the source. The circuit itself provides the required behaviour.
How to connect
- Match every controller label to the circuit view and source pin map.
- Join grounds before signal wires when separate low-voltage supplies are used.
- Keep motors, relays, pumps, and other loads on a suitable driver and external supply.
Common mistakes
Reversed VCC/GND, board-label versus GPIO-number confusion, missing common ground, and charge-only USB cables.
Troubleshoot
Disconnect loads, continuity-test one path at a time, then test with a current limit.
Software preparation
No IDE, board package, library, or firmware upload is required for this project.
If you add a programmable controller as an extension, document its pin map separately.
How to upload code
The original design is implemented entirely in hardware, so proceed after verifying the circuit and supply.
Assemble, deploy, test, and troubleshoot.
Use the complete source notes in build order, then pass the final checks before calling the project finished.
Build in functional stages
- Power and regulation
- Controller or processing stage
- Inputs and sensors
- Outputs and loads
- Enclosure and strain relief
Power up safely
- Inspect unpowered continuity first
- Apply the lowest safe current limit
- Measure supply rails before signals
- Add one load at a time
- Record expected and actual results
Work from simple to complex
- Confirm power, ground, polarity, and orientation
- Compare each pin with the source
- Test inputs separately from outputs
- Replace only one variable at a time
- Power off before every correction
Follow the documented instructions.
These notes come from this project's source and remain in their original order.
Project overview
Project build noteWater covers about 71% of the earth, but sadly there is only drinking water in 2.5% of it. In 2025 we can expect perennial water shortages due to increased population, pollution, and climate change. We waste a lot of drinking water each year due to human negligence. On one hand, there are a number of minor disputes among nations and states regarding water sharing rivers, and on the other, there are national disputes among states regarding water sharing rivers. One gallon of water is enough for an average human to live two days if your tap drips a drop of water every second. This might not seem like a big amount of water at first, but it would take you about five hours to waste one gallon of water. This problem can be solved through technology improvement. The answer always lies in technology development. The water consumption rate can be drastically decreased by replacing all manual taps with a smart faucet that automatically opens and closes without requiring us
to touch the handle. Therefore, we will build a Solenoid Valves and Arduino based Automated Water Dispenser that can automatically dispense water to a glass when it is placed near it.
Materials Required
Project build noteSolenoid Valve, Arduino Uno (any version) HCSR04 – Ultrasonic Sensor IRF540 MOSFET, 1k and 10k Resistor Breadboard, Connecting Wires Working Concept The water dispenser works by dispensing water at the touch of a button. A HCSR04 Ultrasonic Sensor will be used to verify that no glass is placed in front of the dispenser. A solenoid valve will control the flow of water. Which generates electricity to operate when activated, and de- energizes when not in use. The solenoid will be turned on and will wait until the object is removed. We will write an Arduino program that checks if anything is placed near the tap, on the other hand if it is, the solenoid will be turned off, when you remove the object, the solenoid will turn off the water supply automatically.
Circuit Diagram
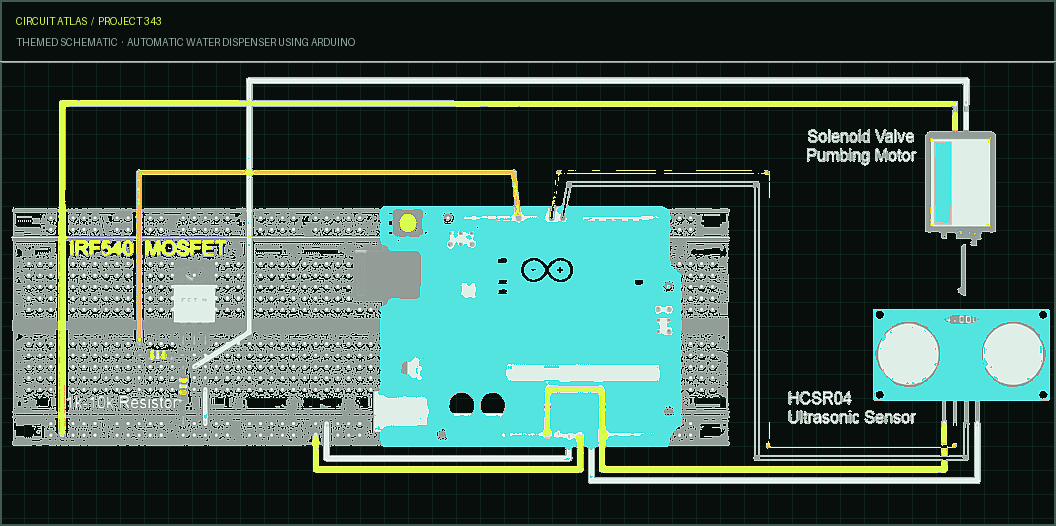
Project build noteAn electromechanical solenoid containing a 12-volt battery is used in this project. It has a continuous current capacity of 700mA. In other words, when the valve is on, it uses about 700mA to keep it on. Hence, a Solenoid driver circuit needs a switching driver to operate an Arduino board that operates with 5V and hence requires a 5V switching driver circuit. IRF540N is the MOSFET used in this project and its switching device is referred to as a N-Channel MOSFET with the Gate, Source and Drain pins originating from pin 1. According to the circuit diagram, the Arduino's Vin pin powers the solenoid's positive terminal. As the Arduino will be powered by a 12V adapter and its Vin pin is 12V, the control of the solenoid can be performed. Several connections are made between the negative terminal and the ground via the MOSFET’s Source and Drain pins. Only if the MOSFET is switched on will the solenoid be powered. Turning the MOSFET on or off is done with the gate pin. A gate pin grounded to ground will remain off while a gate voltage applied to it will turn it on. The gate pin of the MOSFET is pulled down to ground by a 10k resistor when no power is applied to it. A 1K resistor limits the current flowing to Arduino pin 12, which controls the MOSFET.
The Ultrasonic Sensor is powered by connecting a power supply to the Arduino's +5V and ground pins. To pins 8 and 9, respectively, are connected the trigger and echo pins. The Ultrasonic sensor can then be programmed to make use of the Arduino in order to detect objects and turn on the MOSFET if one is detected. My circuit was somewhat like this below after connecting all the wires. The whole circuit is simple and can be easily built on a breadboard.
You built Automatic Water Dispenser using Arduino.
You followed the full workflow from understanding the mission to testing the finished project. That is a real engineering achievement - well done.
Interfacing Flame Sensor with Arduino to Build a Fire Alarm System
Ready to reuse what you learned in another project from the same track?
Start this project →