Connecting ESP32 to Amazon AWS IoT Core using MQTT
492.Connecting ESP32 to Amazon AWS IoT Core using MQTT This is an introduction to Amazon Web Services, more specifically an AWS IoT Core with ESP32 getting started lesson. The AWS Interne…
Know the mission before touching a wire.
Understand what you are making, prepare the right tools, and make the workbench safe.
Project details
Connecting ESP32 to Amazon AWS IoT Core using MQTT is a iot project. 492.Connecting ESP32 to Amazon AWS IoT Core using MQTT This is an introduction to Amazon Web Services, more specifically an AWS IoT Core with ESP32 getting started lesson. The AWS Interne…
- Source pages
- 1397-1408
- Named parts
- 6
- Build goal
- Working, tested prototype
Tools you need
- Digital multimeter
- Wire stripper and side cutters
- Soldering iron with a fine tip
- Current-limited bench supply
- Computer with a data-capable USB cable
Use eye protection, good lighting, and a clean insulated surface throughout the build.
Safety precautions
- Disconnect every power source before changing a connection.
- Check component polarity, pinout, and supply voltage twice.
- Use a current limit for the first power-up.
- Keep liquids, loose metal, and uninsulated wires away from the bench.
Gather, identify, and understand every part.
Use the standardized inventory, then open What's this? to learn each part's role, advantages, limitations, handling, and specifications.
What's this?Image, role, pros, cons, handling & specifications
ESP8266
A programmable controller that reads inputs, makes decisions, and drives the project's outputs.
What it does hereIt is the control centre and must use the documented board, pin map, supply, and logic level.
Buy / compare this part ↗Advantages
- Reprogrammable and reusable
- Large learning ecosystem
- Complex behaviour remains changeable
Limitations
- GPIO voltage and current are limited
- Some pins affect boot or communication
- Loads normally need a driver
Handling
- Disconnect power before rewiring
- Avoid static discharge
- Never power motors, relays, or pumps directly from GPIO
Specifications to verify
- Use the exact model, value, package, and rating listed for ESP8266; similar-looking parts are not always interchangeable.
- Confirm operating voltage, logic level, pinout, memory, USB interface, and maximum GPIO current.
What's this?Image, role, pros, cons, handling & specifications
ESP32
A programmable controller that reads inputs, makes decisions, and drives the project's outputs.
What it does hereIt is the control centre and must use the documented board, pin map, supply, and logic level.
Buy / compare this part ↗Advantages
- Reprogrammable and reusable
- Large learning ecosystem
- Complex behaviour remains changeable
Limitations
- GPIO voltage and current are limited
- Some pins affect boot or communication
- Loads normally need a driver
Handling
- Disconnect power before rewiring
- Avoid static discharge
- Never power motors, relays, or pumps directly from GPIO
Specifications to verify
- Use the exact model, value, package, and rating listed for ESP32; similar-looking parts are not always interchangeable.
- Confirm operating voltage, logic level, pinout, memory, USB interface, and maximum GPIO current.
What's this?Image, role, pros, cons, handling & specifications
DHT11
A named project component whose exact role is defined by the source circuit and build guide.
What it does hereIt performs a documented electrical, control, interface, or construction function in this project.
Buy / compare this part ↗Advantages
- Selected for this project
- Can be checked independently
- Supports modular troubleshooting
Limitations
- Substitutes may differ
- Generic names can hide variants
- Pinouts and ratings vary
Handling
- Compare the received part with the source
- Keep it labelled
- Do not force connectors or adjusters
Specifications to verify
- Use the exact model, value, package, and rating listed for DHT11; similar-looking parts are not always interchangeable.
- Confirm dimensions, ratings, connection method, polarity, and environmental limits.
What's this?Image, role, pros, cons, handling & specifications
Temperature sensor
A sensor converts a physical condition into an electrical signal the circuit can measure.
What it does hereIt provides project input as an analogue, digital, resistive, frequency, or calibrated signal.
Buy / compare this part ↗Advantages
- Adds real-world awareness
- Can usually be tested independently
- Often supports calibration
Limitations
- Readings can drift
- Placement affects results
- Some sensors need warm-up or calibration
Handling
- Protect the sensing surface
- Observe supply voltage and polarity
- Keep signal leads away from noisy power wiring
Specifications to verify
- Use the exact model, value, package, and rating listed for Temperature sensor; similar-looking parts are not always interchangeable.
- Confirm supply range, output type, measurement range, accuracy, response time, and pin order.
What's this?Image, role, pros, cons, handling & specifications
NETWORK
A named project component whose exact role is defined by the source circuit and build guide.
What it does hereIt performs a documented electrical, control, interface, or construction function in this project.
Buy / compare this part ↗Advantages
- Selected for this project
- Can be checked independently
- Supports modular troubleshooting
Limitations
- Substitutes may differ
- Generic names can hide variants
- Pinouts and ratings vary
Handling
- Compare the received part with the source
- Keep it labelled
- Do not force connectors or adjusters
Specifications to verify
- Use the exact model, value, package, and rating listed for NETWORK; similar-looking parts are not always interchangeable.
- Confirm dimensions, ratings, connection method, polarity, and environmental limits.
What's this?Image, role, pros, cons, handling & specifications
NEWLY
A named project component whose exact role is defined by the source circuit and build guide.
What it does hereIt performs a documented electrical, control, interface, or construction function in this project.
Buy / compare this part ↗Advantages
- Selected for this project
- Can be checked independently
- Supports modular troubleshooting
Limitations
- Substitutes may differ
- Generic names can hide variants
- Pinouts and ratings vary
Handling
- Compare the received part with the source
- Keep it labelled
- Do not force connectors or adjusters
Specifications to verify
- Use the exact model, value, package, and rating listed for NEWLY; similar-looking parts are not always interchangeable.
- Confirm dimensions, ratings, connection method, polarity, and environmental limits.
Connect one verified path at a time.
Explore the named components and standardized signal flow, then use Source Check to verify exact physical pins, values, and topology before applying power.
Trace this circuit.
Connecting ESP32 to Amazon AWS IoT Core using MQTT: interactive parts, standardized terminals, responsive anchored wires, student explanations, and the original circuit reference in one shared system.
Trace before wiring
Follow power, ground, inputs, processing, and outputs in that order. Never guess a pin from package shape alone.
Connect with power off
Make short, labelled connections and share a common ground only where the schematic requires it.
Inspect every joint
Check continuity, polarity, adjacent shorts, and loose connections before the first power-up.
Open all source diagrams and build views 9 visuals
Confirm the hardware-only control path.
This project does not include firmware in the source. The circuit itself provides the required behaviour.
How to connect
- Match every controller label to the circuit view and source pin map.
- Join grounds before signal wires when separate low-voltage supplies are used.
- Keep motors, relays, pumps, and other loads on a suitable driver and external supply.
Common mistakes
Reversed VCC/GND, board-label versus GPIO-number confusion, missing common ground, and charge-only USB cables.
Troubleshoot
Disconnect loads, continuity-test one path at a time, then test with a current limit.
Software preparation
No IDE, board package, library, or firmware upload is required for this project.
If you add a programmable controller as an extension, document its pin map separately.
How to upload code
The original design is implemented entirely in hardware, so proceed after verifying the circuit and supply.
Assemble, deploy, test, and troubleshoot.
Use the complete source notes in build order, then pass the final checks before calling the project finished.
Build in functional stages
- Power and regulation
- Controller or processing stage
- Inputs and sensors
- Outputs and loads
- Enclosure and strain relief
Power up safely
- Inspect unpowered continuity first
- Apply the lowest safe current limit
- Measure supply rails before signals
- Add one load at a time
- Record expected and actual results
Work from simple to complex
- Confirm power, ground, polarity, and orientation
- Compare each pin with the source
- Test inputs separately from outputs
- Replace only one variable at a time
- Power off before every correction
Follow the documented instructions.
These notes come from this project's source and remain in their original order.
Project overview
Project build note492.Connecting ESP32 to Amazon AWS IoT Core using MQTT
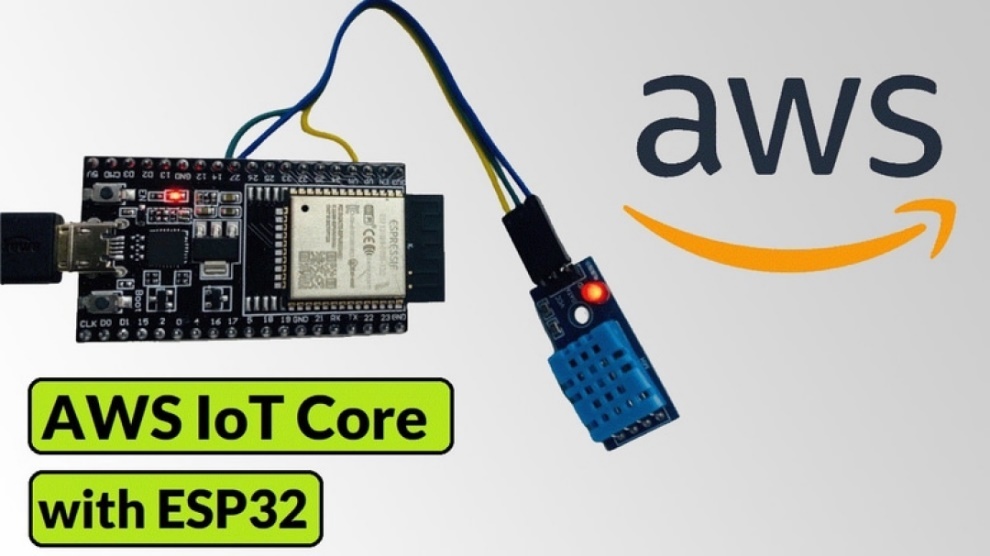
This is an introduction to Amazon Web Services, more specifically an AWS IoT Core with ESP32 getting started lesson. The AWS Internet of Things Core is a managed cloud service that enables connected devices to interface with cloud applications and other devices in a safe and straightforward manner. In this project, we will learn how to connect the ESP32 with AWS IoT Core and publish sensor readings to AWS MQTT. ESP32 is a microcontroller that was developed by Espressif Systems. As a demonstration, we will make use of the DHT11 Sensor and read the data pertaining to the temperature and humidity. The ESP32 will establish a connection to the neighborhood WiFi network and will then upload the data collected by the DHT11 Sensor to the AWS IoT Cloud. Not only can we submit data, but we also have the ability to receive data from the AWS Dashboard. Earlier, we used AWS IoT Core and ESP8266 to publish the data from the sensors to the AWS Dashboard. The lesson is divided into several sections.
Creating an account using and configuring the Amazon Web Services In the Arduino IDE, installing the required libraries and writing an Arduino sketch for the project are both required steps. The process of creating a Thing on Amazon Web Services involves generating certificates and applying policies. Making Adjustments to the Arduino Sketch Based on the Thing Data and Credentials Publish and Subscribe to Data on the Amazon Web Services Dashboard Beginners who are interested in learning more about the Amazon AWS IoT Core for IoT Applications will benefit from this tutorial. In an earlier lesson, we discussed various Internet of Things platforms, such as Google Firebase and Arduino IoT Cloud. You are however able to construct and manage devices for use in business applications using AWS IoT Core. Hardware Setup
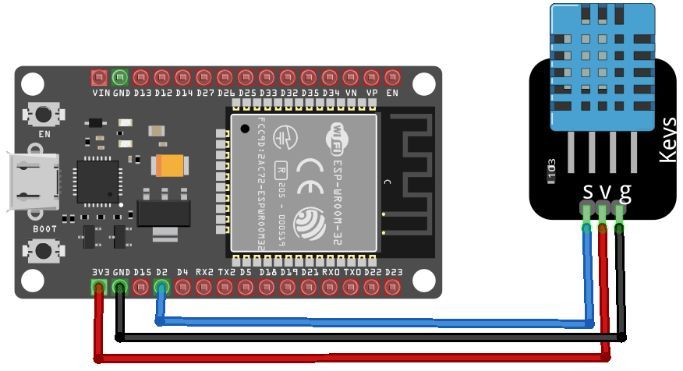
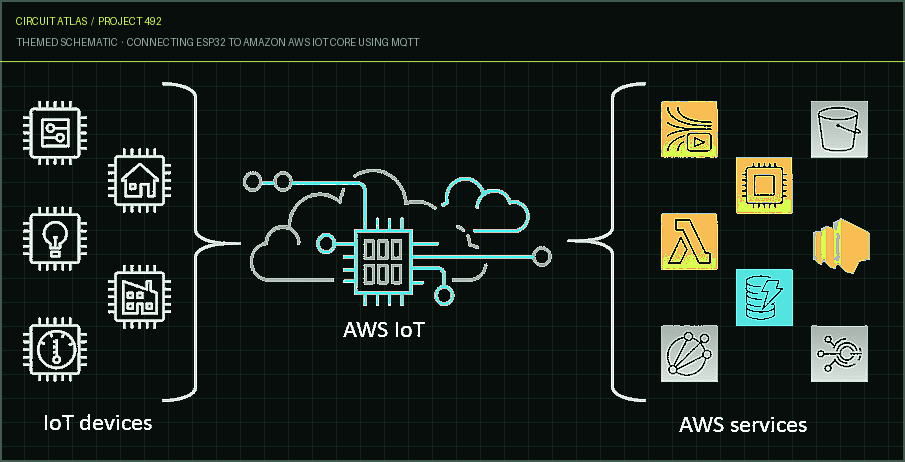
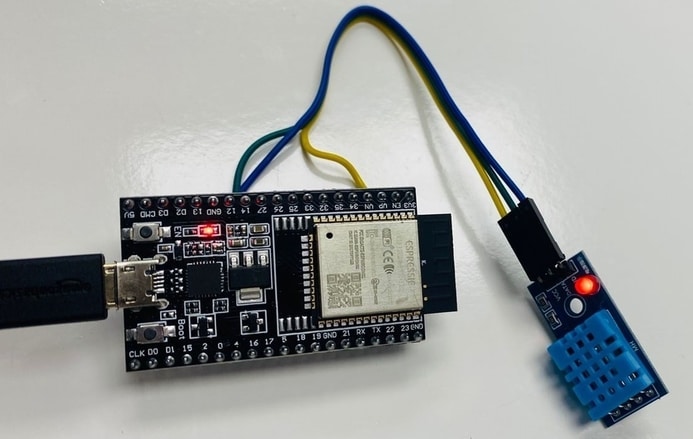
An ESP32 Wifi Module is the piece of hardware that is essential for this project. In addition, we will be utilizing a DHT11 Humidity and Temperature Sensor for the section dealing with the sensors. Connect the DHT11 Sensor to the ESP32 Board. For the connection, you can make use of a breadboard or you can simply make use of a male-to- female connector wire. What is Amazon AWS IoT Core? AWS provides services and solutions for the Internet of Things (IoT), which allows for the connection and management of billions of devices. Your Internet of Things devices can now communicate with other devices and
AWS cloud services thanks to these cloud services. The device software that is provided by AWS IoT can assist you in integrating your Internet of Things devices with solutions that are based on AWS IoT. AWS Internet of Things will be able to link your devices to the cloud services that AWS offers if your gadgets can connect to AWS IoT. AWS IoT gives you the ability to select the technologies that are both most suitable and up to date for your solution. AWS IoT Core supports the following protocols to assist you in the management and support of your
Internet of Things devices out in the field
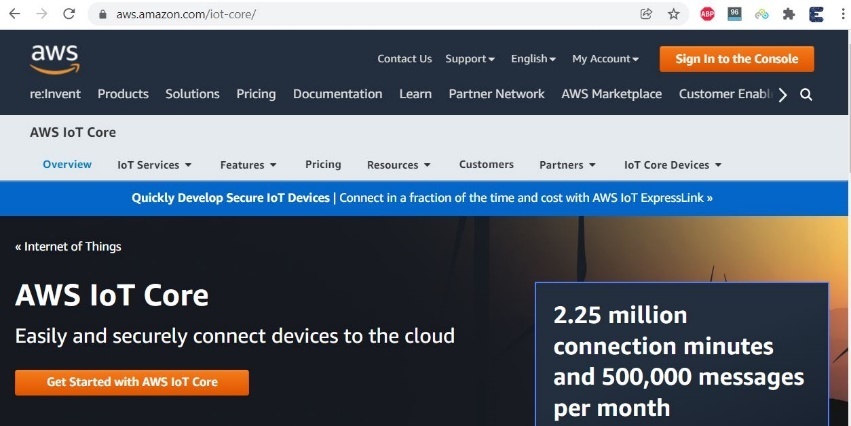
Project build noteMQTT (Message Queuing and Telemetry Transport) (Message Queuing and Telemetry Transport) MQTT over WSS (Websockets Secure) HTTPS (Hypertext Transfer Protocol – Secure) (Hypertext Transfer Protocol – Secure) LoRaWAN (Long Range Wide Area Network) (Long Range Wide Area Network) How to Get Started with the Amazon AWS IoT Core Using an ESP32 Beginning your work with AWS IoT core is a fairly straightforward process. To successfully set up the ESP32 board and get started on your very first project, all you have to do is follow the procedures that are outlined in this session. Signing in Open up your web browser, do a search for "aws.amazon.com/iot-core/," and click on the link that comes up.
Basically, we have to create an AWS account right this minute. Create an account for yourself by entering your email address and choosing a password. Information on your bank credit card is also required for the account. There will be no fees associated with this, however Amazon Web Services will require a verification using your bank account. In addition to that, it will need confirmation of the phone number. As a result, the creation of the account will go off without a hitch. AWS IoT Core Dashboard
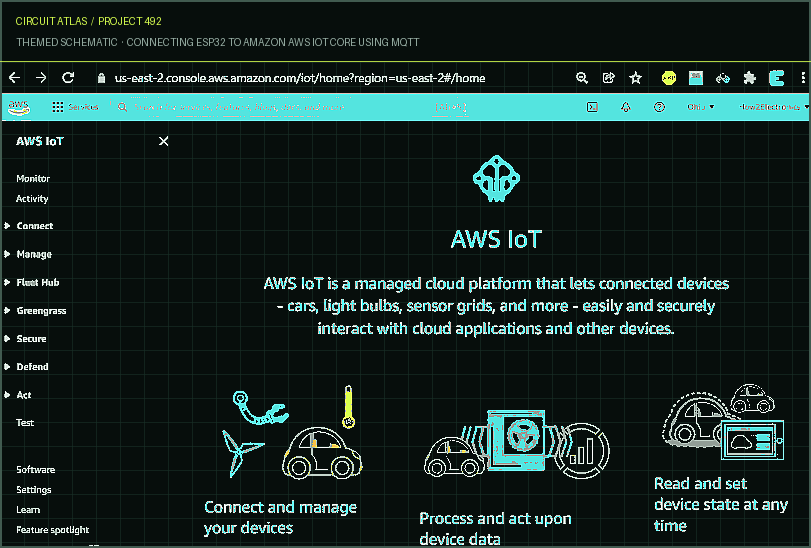
Following a successful authentication, the window for the AWS Management Console will become available. In the services search tab located at the top of the page, type "IoT core" and press the enter key. You can initiate the appearance of an AWS IoT Dashboard by clicking on the IoT Core button. There are quite a few buttons and menus over on the left side of the control panel. But in this situation, we need to work with two different possibilities. The first one is referred to as the manage option, while the second one is known as the secure option. Creating a Thing The next step in our project is to develop something that is connected to it.
To accomplish this, proceed with the procedures below
Project build noteSpecifying thing properties Configuring device certificate the practice of affixing policies to certificates Click on the Thing option found under the Manage menu. Now, we need to make a Thing out of this space. To begin, navigate to this page and select Create Things. You have the option of either creating a single item or a large number of individual items. However, use the option to produce a single thing for our applications. After that, click the Next button. Specify Thing Properties At this point, we need to declare the attributes of the Thing. First things first, give it a name. You are free to give it any name you like. For instance,
I will call it ESP32 DHT11 in this case. In the other configurations, there is no requirement for any modifications to be made. Choose "No shadow" from the drop-down menu that appears when you click the "device shadow" option. After that, click the Next button. Generate Device Certificate The device certificate has to be configured at this time. You have the option to either manually generate a new certificate, use an existing one, submit a CSR, or simply skip this step entirely. However, the advice made by AWS is to choose the option to Auto Generate a New Certificate. After that, click the Next button. Create & Attach Policy Now that the Things have been constructed, we need to affix a policy to them. However, there are no policies in place at this time. Therefore, the first thing we need to do is draft a policy. Therefore, select the Create Policy option. Here, you can give the policy whatever name you like. For the sake of illustration, I will assign it the name "ESP32 Policy." Now comes the extremely critical portion where you add the statement. In the box labeled "action," type "IoT." Therefore, a number of choices will become available. From this point forward, all that will be required of us is to post, subscribe, connect, and receive. Now, create the policy by clicking the create button. This indicates that the policy was developed effectively. Now navigate back to the option to Create Thing. Therefore, a policy choice will become available. To complete this step, we will need to affix
the policies to the certificate. Therefore, choose the newly-apparated policy, and then click on the "make a thing" button. First, download the device certificate, and then save the file to your computer under the same name but with the extension "device certificate." Download the public key, and then rename the file so that it reflects its purpose as a public key. The private key must then be downloaded, and its filename must be changed to reflect its new status. There are two certificates located in this section of the Root CA Certificates. However, all that is required of us is a Root CA1 certificate; therefore, download that as well. Now that we have downloaded all of the necessary certificates for our project, we can go forward.
Installing Necessary Arduino Libraries 1. ArduinoJSON Library Therefore, the first thing you should do is open the library manager, then search for "JSON," and then install the library. 2. PubSubClient Library Once more, open the library manager, search for "PubSubClient," and then install the library that Nick O'Leary provided you with. 3. Library for the DHT11 Sensor Look up "dht11," and then download and install the library.
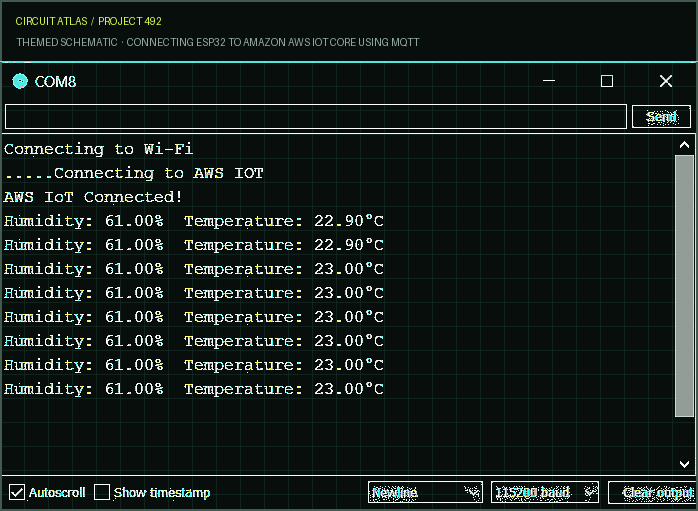
Testing the Publishing & Subscription of Data After you have finished making all of the necessary modifications, you should connect the ESP32 to your computer. After that, select the ESP32 Board that you are employing for this project by going to the tools menu. Additionally, choose the COM port. The code can then be transferred to the ESP32 board by selecting the upload option and clicking "upload." Once the code has been successfully uploaded, launch the Serial Monitor. The ESP32 will make an attempt to establish a connection to the WiFi Network. It will attempt to connect to the AWS IoT Server as soon as it has established a connection to the WiFi Network. The value of both the temperature and the humidity will be displayed on the Serial Monitor. Adding Sensor Data to an Amazon Web Services Dashboard It is also recommended that the identical thing be sent to the AWS Server. Proceed to the test area of the AWS Dashboard in order to verify that. Within the testing section, you'll find a button that allows you to subscribe and publish.
You will need to subscribe to a subject in order to view the data now. In order to accomplish this, go to the topic filter area and enter "esp32/pub." You have the option to make adjustments in the additional configuration if you so choose. After that, select the option to subscribe. After you have clicked the subscribe button, the information collected by the ESP32 will immediately be uploaded to the AWS Dashboard. As a result, the data from the DHT11 Sensor have been successfully transmitted to Amazon AWS IoT Core using ESP32. Here, the data is refreshed after an interval of one second at regular intervals. This is truly incredible because it enables us to receive the data to AWS IoT Core Dashboard that has been delivered from ESP32 using the MQTT protocol. The data that we have subscribed to is read in this manner. Publishing Data to Serial Monitor Now, let's find out whether or not we are able to publish the data coming from the AWS IoT core to the ESP32. You need to publish to a topic in order to view the data at this time. In order to do it, go to the topic filter area and type "esp32/sub." Nothing should be done under additional configuration. After that, select the publish option. The message that was just sent to the Serial Monitor is immediately visible to you. This is incredible once more. The publish technique can be used to control an LED if you follow these instructions. Using ESP32 in this manner will allow you to send data to or receive data from Amazon AWS IoT Core. We are able to subscribe to sensor readings topics that are published by multiple IoT nodes by utilizing AWS MQTT. This is an introductory tutorial for users who wish to begin using Amazon
Web Services for their Internet of Things devices, and it is written at a level appropriate for novices.
You built Connecting ESP32 to Amazon AWS IoT Core using MQTT.
You followed the full workflow from understanding the mission to testing the finished project. That is a real engineering achievement - well done.
Aquarium Water Quality Monitor with TDS Sensor & ESP32
Ready to reuse what you learned in another project from the same track?
Start this project →